Why I’m Rolling Back Security Patch 16.5.1 (c) on iPhone

I seldom roll back patches. Especially security patches. I work in security. It’s essential to stay up-to-date with the latest security patches to protect our devices from potential threats. However, sometimes these patches can inadvertently introduce new issues, affecting the overall user experience. In this blog post, we’ll explore the reasons behind the decision to roll back the security patch 16.5.1 (c) on the iPhone, focusing on the specific issues it caused: the breakdown of Bluetooth texting with Microsoft Windows phone link and Tesla’s voice texting functionality.

The Importance of Security Patches:

Before we delve into the reasons for rolling back the security patch, let’s acknowledge the significance of timely updates. Security patches play a crucial role in safeguarding our devices against potential vulnerabilities, malware, and other cyber threats. They are essential for maintaining a secure and stable environment for users.

The Problematic Patch:

While patch 16.5.1 (c) aimed to improve the security of iPhones, it unintentionally disrupted certain functionalities, leading to frustration for many users. Two of the prominent issues experienced were the inability to use Microsoft Windows phone link for texting and a failure of voice texting in Tesla vehicles.

Bluetooth Texting with Microsoft Windows Phone Link:
Many iPhone users rely on Bluetooth connectivity to stay connected while on the move. The Microsoft Windows phone link provides seamless integration between iPhones and Windows PCs, allowing users to send and receive text messages directly from their computers. However, after applying security patch 16.5.1 (c), users noticed that this feature ceased to function as expected.

Rolling back the patch is essential to restore this valuable functionality, enabling users to stay productive and connected regardless of the device they are using.

Texting with Voice from Tesla Vehicles:
Voice-activated features have become increasingly popular in modern vehicles, enhancing convenience and safety while driving. Tesla’s voice texting functionality enabled iPhone users to send and receive texts hands-free, contributing to a safer driving experience. Unfortunately, after applying the security patch, this feature stopped working in Tesla vehicles.

With safety being a top priority, it’s crucial to resolve this issue promptly. By rolling back the patch, iPhone users can once again enjoy the convenience and safety of voice texting in their Tesla vehicles.

The Decision to Roll Back:

The decision to roll back the security patch was not taken lightly, considering the importance of maintaining a secure device. However, the issues faced by users with Bluetooth texting and voice texting in Tesla vehicles were significant enough to warrant action. The lack of these essential functionalities could hinder productivity, communication, and safety, potentially outweighing the security benefits of the patch.


Apple’s Commitment to Users:

As a tech giant, Apple is known for its dedication to providing a seamless user experience. In light of the reported issues, it is reasonable to expect that Apple will address the problems promptly and release a revised security patch that addresses the concerns without compromising on security.

Conclusion:

Staying on top of security updates is crucial in today’s digital landscape, but sometimes unforeseen issues can arise. The decision to roll back the security patch 16.5.1 (c) on the iPhone, which caused Bluetooth texting problems with Microsoft Windows phone link and disabled Tesla’s voice texting functionality, aims to prioritize user convenience and safety. Apple’s commitment to its users should lead to a swift resolution of the problems faced, ensuring a harmonious balance between security and seamless connectivity in future updates.

Troubleshooting a Mysterious Networking Issue in Windows 11 (NOT!)

Networking issues can be frustrating and time-consuming to troubleshoot. This was just one of my many experiences troubleshooting an interesting network issue that took me a while to solve.

The Problem: One day, I noticed that my computer’s network connection was acting up. The network interface card (NIC) was sending packets just fine, but it was receiving very few packets, and eventually, it would stop receiving packets altogether. At first, I suspected that the issue happened after I installed the Insider Preview of Windows 11, so I reset Windows. I updated the Realtek NIC driver to the latest version, hoping that it might help. The problem persisted.

The Troubleshooting: Next, I decided to reinstall Windows 11 from scratch, thinking that it might fix the issue. The problem still persisted even after the fresh install. Now I knew that the issue was likely to be hardware.

I boot into Linux from a USB drive. To my surprise, the issue persisted even in Linux. This ruled out any software or driver issues with Windows.

The Solution: I started to suspect that the issue might be with my Wi-Fi access point. I have a TP-Link Deco 6E mesh Wi-Fi system, and one of the access points acts as the main router. I decided to swap the problematic access point with another one, and to my relief, the issue disappeared instantly. My NIC was now sending and receiving packets normally, and I was back online.

Conclusion: Networking issues can be tricky to troubleshoot, and it’s easy to get lost in a sea of software and driver issues. Sometimes, the problem might not even be with your computer at all, but with your network equipment. If you’re experiencing a similar networking issue, try ruling out all software and driver issues first, and then focus on your network equipment. Hopefully, my experience will save you some time and frustration.

Not all SD card readers are alike!

If you asked me a year ago what SD card reader to get, I probably would’ve said to just get whichever one works. Well, clearly, I was wrong!

I’m obviously not a hardcore photographer/videographer or professional multimedia editor or anything like that!

I tried out a handful of readers that I’ve had over the years. Here are the readers ranked from slowest to fastest. Probably from oldest to newest also.

This one I’ve had probably for over 10 years. These were like $2 or something back then. I think I either got it on eBay or some discount website. They were for convenience for me – back then, sometimes, I used these as USB sticks.

Bus 001 Device 002: ID 058f:6335 Alcor Micro Corp. SD/MMC Card Reader

Image result for sd card reader

This one came with one of my cameras or something. It was probably a cheap camera that recorded to microSD. It’s not terribly slow, but not reliable. Maybe it was the Linux driver, but there were many times when I couldn’t write the entire microSD card before it just hung. Pulling it out and remounting corrected this, but was done almost every other time when writing an entire sd card.

Bus 001 Device 025: ID aaaa:8816 MXT microSD CardReader

Image result for sd card reader


This one came with my Raspberry Pi. It’s also not terribly slow, but not fantastic. What I like about it is that it supports both, USB-A and USB-C.

Bus 001 Device 024: ID 14cd:1212 Super Top microSD card reader (SY-T18)

Here’s the speed of an internal microSD card on a 2021 Dell Inspiron 5502/5509. Pretty disappointing speed!

Also crap, this was something like $30 – pretty expensive, but elegantly fits on the MacBook Pro. Unfortunately, not very reliable. When plugging in too many things, you could get very annoying, random disconnects.

Bus 001 Device 029: ID 05e3:0749 Genesys Logic, Inc. SD Card Reader and Writer

This one turned out to be the fastest one I had. The speed is below, using an adapter from USB-c to USB-A, it still ran pretty fast.

128177930240 bytes (128 GB, 119 GiB) copied, 4157.25 s, 30.8 MB/s

SD cards of different brands are slightly different sizes.

I recently downloaded an img file online where a lot of people claimed the image was too large for their SD cards. For that reason, I got a bit curious to know which card he used, which cards were larger/smaller, etc.

These were the partitions on that image.

Device Boot Start End Sectors Size Id Type
image.img1 32768 262143 229376 112M c W95 FAT32 (LBA)
image.img2 262144 14598143 14336000 6.8G 83 Linux
image.img3 14598144 250347519 235749376 112.4G 7 HPFS/NTFS/exFAT

The last sector is marked in bold. The person that shared the image claimed that the card he used was the same Samsung 128gb EVO select card. I guess he was lucky. I have 2 of those cards and this image didn’t fit on either of them.

I went through all of my SD cards to check their sizes hoping to find one that fit. Here are the sizes in order from smallest to largest.

Team 128GB Elite microSDXC UHS-I U3, V30, A1, 4K UHD Memory Card with SD Adapter, Speed Up to 90MB/s (TEAUSDX128GIV30A103)

Team 128GB Elite microSDXC UHS-I U3, V30, A1, 4K UHD Memory Card with SD Adapter, Speed Up to 90MB/s (TEAUSDX128GIV30A103)

Disk /dev/sde: 117.75 GiB, 126437294080 bytes, 246947840 sectors
Disk model: MassStorageClass
Units: sectors of 1 * 512 = 512 bytes
Sector size (logical/physical): 512 bytes / 512 bytes
I/O size (minimum/optimal): 512 bytes / 512 bytes
Disklabel type: dos
Disk identifier: 0xc9f931c9

Device Boot Start End Sectors Size Id Type
/dev/sde1 32768 262143 229376 112M c W95 FAT32 (LBA)
/dev/sde2 262144 14598143 14336000 6.8G 83 Linux
/dev/sde3 14598144 246947839 232349696 110.8G 7 HPFS/NTFS/exFAT

This was the smallest of the cards. The difference in size is only a couple of gigabytes, but if you tried to load the image on this card by the byte, you would not be successful.

SanDisk 128GB Extreme MicroSDXC UHS-I Memory Card with Adapter – C10, U3, V30, 4K, A2, Micro SD – SDSQXA1-128G-GN6MA

Disk /dev/sdd: 119.08 GiB, 127865454592 bytes, 249737216 sectors
Disk model: MassStorageClass
Units: sectors of 1 * 512 = 512 bytes
Sector size (logical/physical): 512 bytes / 512 bytes
I/O size (minimum/optimal): 512 bytes / 512 bytes
Disklabel type: dos
Disk identifier: 0xc9f931c9

Device Boot Start End Sectors Size Id Type
/dev/sdd1 32768 262143 229376 112M c W95 FAT32 (LBA)
/dev/sdd2 262144 14598143 14336000 6.8G 83 Linux
/dev/sdd3 14598144 249737215 235139072 112.1G 7 HPFS/NTFS/exFAT

This card was also one of the smaller cards.

SAMSUNG (MB-ME128GA/AM) 128GB 100MB/s (U3) MicroSDXC EVO Select Memory Card with Full-Size Adapter

Disk /dev/sdd: 119.25 GiB, 128043712512 bytes, 250085376 sectors
Disk model: MassStorageClass
Units: sectors of 1 * 512 = 512 bytes
Sector size (logical/physical): 512 bytes / 512 bytes
I/O size (minimum/optimal): 512 bytes / 512 bytes
Disklabel type: dos
Disk identifier: 0xc9f931c9

Device Boot Start End Sectors Size Id Type
/dev/sdd1 * 32768 250085375 250052608 119.2G 7 HPFS/NTFS/exFAT

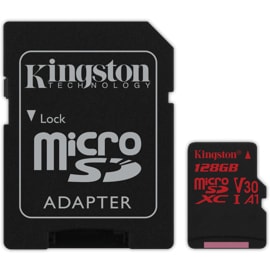
Front view of the Kingston 128GB microSDXC Canvas React Card + SD Adapter

Disk /dev/sdd: 119.48 GiB, 128286982144 bytes, 250560512 sectors
Disk model: MassStorageClass
Units: sectors of 1 * 512 = 512 bytes
Sector size (logical/physical): 512 bytes / 512 bytes
I/O size (minimum/optimal): 512 bytes / 512 bytes
Disklabel type: dos
Disk identifier: 0xc9f931c9

Device Boot Start End Sectors Size Id Type
/dev/sdd1 32768 262143 229376 112M c W95 FAT32 (LBA)
/dev/sdd2 262144 14598143 14336000 6.8G 83 Linux
/dev/sdd3 14598144 250347519 235749376 112.4G 7 HPFS/NTFS/exFAT
/dev/sdd4 250347520 250560511 212992 104M 83 Linux

The difference in sizes are trivial, but as you can see, the image would only fit on 1 of the cards. I’ll show you in a later post how I got the image to fit on any card.

Rebroadcast your neighbor’s wifi for yourself (wifi extender) with Tomato firmware

My parents recently swapped Internet providers and since they didn’t know that it would take a week for the application to be completed, they were out of Internet service for about a week. The neighbors graciously allowed them to use theirs, but the signal didn’t reach the entire house. To make it reach, we configured the router to rebroadcast their wifi. If you’re going to be doing this, please make sure you get permission first!

The easiest way to do this is to just get one of those wifi extenders. We just didn’t happen to have any at the time. Since the router was Tomato compatible, I first flashed the router with tomato. The screenshots you’re seeing are Tomato by Shibby, just with a custom skin.

To do this, you first need to find out what IP address range you can use. I did this just by connecting a laptop to their wifi. Turned out that the IP address their DHCP server gave me was 192.168.7.x. I tried to ping 192.168.7.253 to make sure it wasn’t taken and sure enough, it wasn’t. I assigned 192.168.7.253 to my router.

Next, I needed to disable DHCP. You don’t want your DHCP competing with the neighbor’s. Lastly, use the default gateway that you get from their DHCP server. In my case, it was 192.168.7.1. You can use the DNS server from them also or you can use others. I like Quad9’s 9.9.9.9 or Cloudflare’s 1.1.1.1 or Google’s 8.8.8.8.

After that, you can match up your wifi settings with theirs’ so that it can connect. Use the exact same SSID, shared key, and use “Wireless Ethernet Bridge” for the Wireless Network Mode.

Lastly, optionally, you can put up any your own wifi settings as virtual wifi settings so that you don’t need to reconfigure any of your own devices.

The virtual setting is the wl0.1. Just add it and that’s it!

That’s all you need to do to make your own Tomato Wireless Extender. This has much better range than a regular wifi extender and was available at the time.

Protect your home network using TomatoUSB – how to only allow only HTTP/S out!

While we continue to see the WannaCry and other malware around, I thought I would secure my own network. Since I allow visitors onto their networks, I figured I would configure all new DHCP’d hosts to access the Internet only via HTTP and HTTPs and not allow them to use any DNS servers other than OpenDNS. Here’s how to do it:

The first thing I did was create an access restriction. I did this just to see what chain would be created and I would put subsequent rules into that chain.

access restriction screenshot

The previous screenshot created this chain:

Chain rdev07 (1 references)
target prot opt source destination
DROP all -- 192.168.0.15 anywhere

With this chain, I can add additional rules. The first thing I want to do is allow only DNS access to OpenDNS servers and none other. For this, I would run the following commands:

iptables -A rdev07 -4 -p tcp -s 192.168.0.0/24 -d 208.67.222.222/32 --dport 53 -j ACCEPT
iptables -A rdev07 -4 -p udp -s 192.168.0.0/24 -d 208.67.222.222/32 --dport 53 -j ACCEPT
iptables -A rdev07 -4 -p tcp -s 192.168.0.0/24 -d 208.67.220.220/32 --dport 53 -j ACCEPT
iptables -A rdev07 -4 -p udp -s 192.168.0.0/24 -d 208.67.220.220/32 --dport 53 -j ACCEPT
iptables -A rdev07 -4 -p tcp -s 192.168.0.0/24 -d 0.0.0.0/0/0 --dport 53 -j REJECT
iptables -A rdev07 -4 -p udp -s 192.168.0.0/24 -d 0.0.0.0/0/0 --dport 53 -j REJECT

These rules basically allow DNS queries from my network to the 2 OpenDNS servers. The last 2 rules mean that no other DNS servers outside of those 2 servers can be queried. The reason I do this is because there is some malware out there that will change the DNS servers to query on Windows, effectively overriding the DHCP setting. An alternative to this would be to configure Tomato to intercept DNS requests, but I would rather do it this way.

I added the following rules because I had noticed for some reason that some connections coming back from OpenDNS were dropped. I think they’re optional, but I put them in.

iptables -A rdev07 -4 -p tcp -s 208.67.222.222/32 -d 192.168.0.0/24 --sport 53 -j ACCEPT
iptables -A rdev07 -4 -p udp -s 208.67.222.222/32 -d 192.168.0.0/24 --sport 53 -j ACCEPT
iptables -A rdev07 -4 -p tcp -s 208.67.222.222/32 -d 192.168.0.0/24 --sport 53 -j ACCEPT
iptables -A rdev07 -4 -p udp -s 208.67.222.222/32 -d 192.168.0.0/24 --sport 53 -j ACCEPT

Next, I go to create my whitelist – this would be my iPhone, iPad, android, etc – any hosts that I trust. I’m going to allow these host to go out to any host with TCP and UDP.


iptables -A rdev07 -4 -p tcp -s 192.168.0.3/32 -d 0.0.0.0/0 -j ACCEPT
iptables -A rdev07 -4 -p tcp -s 192.168.0.11/32 -d 0.0.0.0/0 -j ACCEPT
iptables -A rdev07 -4 -p tcp -s 192.168.0.31/32 -d 0.0.0.0/0 -j ACCEPT
iptables -A rdev07 -4 -p udp -s 192.168.0.3/32 -d 0.0.0.0/0 -j ACCEPT
iptables -A rdev07 -4 -p udp -s 192.168.0.11/32 -d 0.0.0.0/0 -j ACCEPT
iptables -A rdev07 -4 -p udp -s 192.168.0.31/32 -d 0.0.0.0/0 -j ACCEPT
I know that they can still get viruses. I hope they don’t. They can only use OpenDNS for DNS services, but they can access basically anything outside on any port.
Lastly, I configure the rules to allow only HTTP and HTTPs out.
iptables -A rdev07 -4 -p tcp -s 192.168.0.0/24 -d 0.0.0.0/0 --dport 80 -j ACCEPT
iptables -A rdev07 -4 -p tcp -s 192.168.0.0/24 -d 0.0.0.0/0 --dport 443 -j ACCEPT
iptables -A rdev07 -4 -p all -s 192.168.0.0/24 -d 0.0.0.0/0 -j DROP
With this, anyone else on the network can connect to port 80 and 443 of any host on the Internet. Then, any traffic going out to any other port is dropped.
After testing all commands and seeing that they worked for me, I put them all into Administration/Scripts/Firewall.
Inserting custom firewall rules
Have fun and be safe! Please post any comments below.

How to find and online all of your SteelFusion Core LUNs on a NetApp filer

Recently, I offlined a bunch of LUNs that had belonged to a SteelFusion Core in the lab that I had forgotten about. Needless to say, I had some unhappy users. The good news though is that I was able to get the LUNs back up and connected to the Core within minutes. This is how I did it.

The first thing I needed to do was find out which LUNs the Core was using. I did this by logging into the Core via SSH and running the following commands:

enable
conf t
terminal length 0
show storage luns iscsi

I output this to a file /tmp/core30luns.txt. An entry looks like this:

Total LUNs: 9
Locally Assigned Serial: P3PdB/-GFigd
Configuration status : Ready
Alias : avamar_restore
LUN Size : 150.00 GB
LUN Type : iscsi
Online : yes
IOPs acceleration : Enabled
Failover Enabled : yes
Prefetch : Enabled
Edge mapping : pod3-3100b
Target mapping : iqn.2003-10.com.riverbed:oh1mt0017065c.000
Origin portal : 10.33.192.174, 10.33.192.175
Origin target : iqn.1992-08.com.netapp:sn.135037602
Backend session status : Connected
Use iSCSI Reservation : Yes
LUN Edge data session : Connected
Client type : other
Original LUN vendor : NetApp
Original LUN serial : P3PdB/-GFigd
Pinned : no
Prepop : Disabled
Smart prepop : Enabled
Prepop status : N/A
MPIO policy : roundrobin
iSCSI Reservation status : LUN reserved

Prepop schedules:
Mapped igroups:
all

Mapped initiators:

The next thing was to find out what LUNs are on the NetApp to do some matching. You can do that by running this command:

lun show -v

I output this to a file /tmp/netapp_luns.txt. An entry looks like this:

/vol/NewYork_rvbd_d_e7cc5c29_f400_4c52_b1d4_f87da1b62652_1451278801/lun_RDM 10g (10737418240) (r/w, offline)
Serial#: P3PdB/9ytT31
Share: none
Space Reservation: disabled
Multiprotocol Type: vmware

Now with the 2 files, I could do some matching. I first want to extract the serial numbers from the LUNs. I do this by running:

grep serial /tmp/core30luns.txt | cut -f2 -d: > /tmp/core30lunlist.txt 

From that, I would just get a list of serial numbers like this:

P3PdB/-GFigd

Next, I will loop through my list of LUNs to find the volumes I will need to put back online. I do this by running:

for i in `cat /tmp/core30lunlist.txt`; do grep -2 $i /tmp/netapp_luns.txt >> /tmp/netappvolumes.txt; done

This would give me a list like this:

/vol/NewYork_rvbd_d_8f3a7b69_05f7_4be8_b3a6_14a689c2b3b0_1452834001/lunC11 60.0g (64445480960) (r/w, offline)
Comment: “Cdrive”
Serial#: P3PdB/-KWreM
Share: none
Space Reservation: disabled

With that list, I can cut the volumes out with the following command:

grep -v : /tmp/netappvolumes.txt | cut -f1 -d' ' > /tmp/volumes.txt

This would give me a list like this:

/vol/NewYork_rvbd_d_8f3a7b69_05f7_4be8_b3a6_14a689c2b3b0_1452834001/lunC11

Now that I have a list of volume names from the NetApp, I can just put them all online with a loop:

for i in `cat /tmp/volumes.txt`; do echo "lun online" $i >> /tmp/online_vols.txt ; done

You can just take the /tmp/online_vols.txt file now and just paste it into your NetApp SSH session and you’ll have all of your LUNs online again.


Wait … before you move to Tomato from DD-WRT!

If you’re reading this, it’s probably too late. You’re probably already running into this issue:

401

and it’s probably driving you nuts!

If you haven’t done the move yet, good. Telnet into the router and run:

nvram get http_username

and

nvram get http_passwd

The way that Tomato and DD-WRT store passwords usernames and passwords is different – DD-WRT stores them encrypted whereas Tomato doesn’t, so with this, you can use it to log into Tomato after you’ve done the move. I call it a move and would hate to call it an upgrade, because some hardcore DD-WRT users might be offended.

Now, if you haven’t done this already and are seeing the error, this will be interesting. With the ASUS router, I think I was able to just do a 30-30-30 reset and it took care of it. Unfortunately with Shibby’s implementation of Tomato, they don’t implement the reset button, so you can press the reset button until you’re blue in the face and it won’t do a thing. On other routers, you may need to press the SES/AOSS button. On the Netgear Nighthawk, it’s the WIFI on/off button. You can hold it down and it will start a password-less telnet daemon at port 233 if held for 20+ seconds. So, when you’re booted into Tomato (the web login will still say DD-WRT) and you can’t log in, hold the button down for 20+ seconds and then go to the command prompt and run:

telnet <router IP> 223

There, you should be able to run the 2 ‘nvram get’ commands and use that info to log into the router and do a reset from there.

Hope this helps!

Why I choose TomatoUSB over DD-WRT

I recently bought a Netgear Nighthawk R7000 for my home router. I figured it would be a good time to get a new router, so I was debating between this on and the ASUS (RT-AC68U). I chose the Nighthawk purely based on price. It was 10% off at Target. 🙂 When I shop for a router, I normally try to get open-source. The reason for this is so that I can hack it as I enjoy doing things like that and I like to use features that are not designed the original product. Why companies build routers and put their own firmware on it is beside me. I really wonder why they don’t just use the open-source stuff since it’s so good. If you look at my blog, you’ll see that I have run DD-WRT on my older routers as well.

The reason I decided to go with Tomato instead of DD-WRT is because of a couple of features that I like in Tomato. The first feature is the QOS transfer rates.

Screen Shot 2014-06-11 at 10.59.05 PM

I haven’t found where I can easily do this in DD-WRT. The reason I like this feature is because I can instantly know who is using up my bandwidth.

Another feature I like that unfortunately does not work on this router yet is A feature where I could see all of the URLs that I’ve visited and searches that I’ve done. I hope that Shibby fixes this in the 121 build.

Screen Shot 2014-06-11 at 11.01.41 PM

These are the two major reasons why I decided to use Tomato over DD-WRT. I’ve also run into issues with using the wireless bridge feature in DD-WRT where Tomato worked very easily.

I would love for some DD-WRT hardcore fans to debate with me. I’ve used DD-WRT firmware for a long time and just switched to Tomato very recently. The main reason I switched to Tomato was back in the days when I had the ASUS RT-N16 router. DD-WRT had Wi-Fi that kept dropping off almost daily and I had to find something better and Tomato was the answer at the time.

Please post your comments! Thanks!

P.S. Here‘s a good link on how to set up DD-WRT with a VPN.